|
A Sterling Silver Cabochon Pendant The Making of From Start to Finish By Mike Streeter Page 4 Step 5 - Setting the Cabochon in Silver
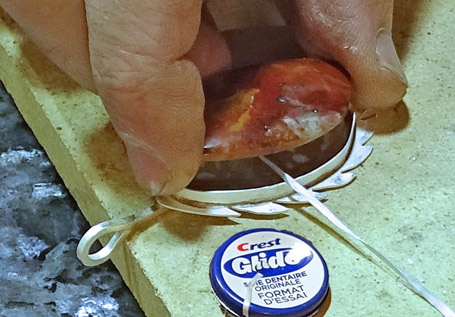
A good trick when fitting a cabochon into a bezel setting is to use dental floss to make sure it can be removed when it is necessary to use sandpaper to lessen the height of the bezel wire, as is most often the case.
Since the height of the bezel wire was too high for the cabochon, I used sandpaper to reduce it, applying pressure in areas that were higher than others relative to the cabochon. I tested the fit several times using the dental floss trick to remove the cabochon each time it was necessary.
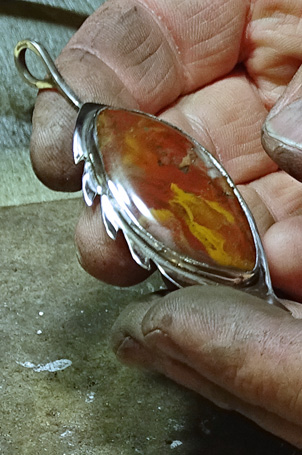
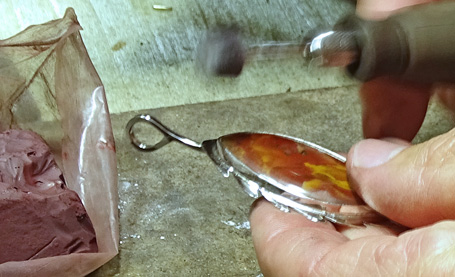
Once I was satisfied with the fit and height of the bezel wire, I carefully inserted the cabochon into the setting and prepared for the next step which was to use a burnishing tool to set the stone.
Pressure is applied in just the right way with a burnishing tool to flatten and smooth out the bezel wire where it meets the cabochon. Great care to not scratch the stone or silver must be taken during this process requiring sufficient time and significant hand pressure to properly complete.
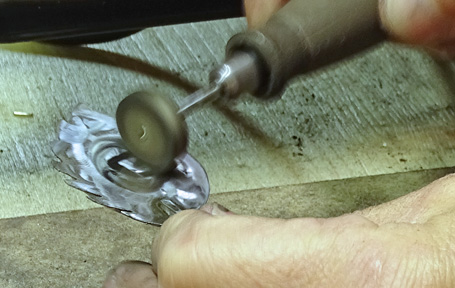
Once the cabochon was set and I could see that there were no significant gaps or puckers, the next relatively lengthy step involved finishing the silver with the use of a Dremel tool and specialized sanding and polishing compounds on felt wheels.
The pendant had to be thoroughly washed in the sink with soap and water to remove every bit of bobbing compound before beginning the next step with a finer polishing compound.
The same process was employed with Tripoli compound for smoothing followed by red rouge compound for a final polish, taking great care to not contaminate one with the other.
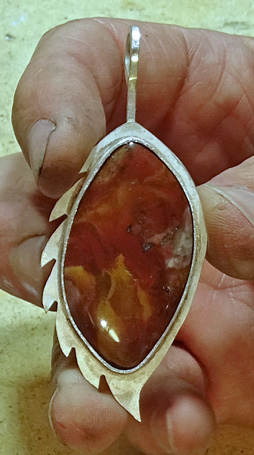
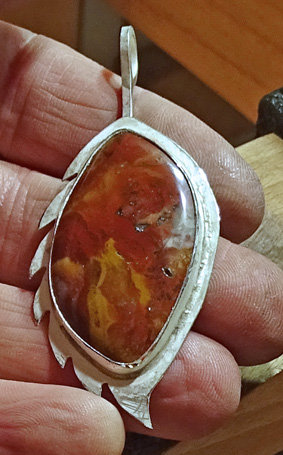
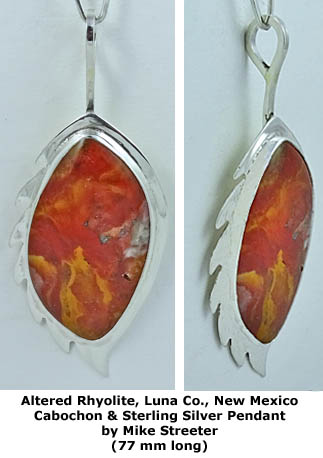
After the final polish with red rouge, it was time to inspect the finished pendant. While virtually no handmade silver pendant is without some imperfections, this one turned out good enough for Chrissy to give it her coveted (by me) stamp of approval!
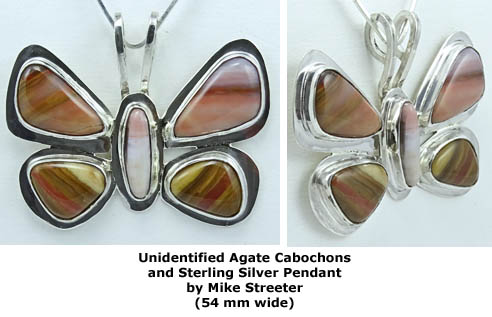
Well, that's it. The whole process, excluding traveling, rockhounding, slabbing the rock, pendant design and camera setup, took me a total of about 3 hours to complete and this was a relatively simple design. I've spent many more hours than this completing more complicated pieces like the one shown below that was like doing five pendants all in one.
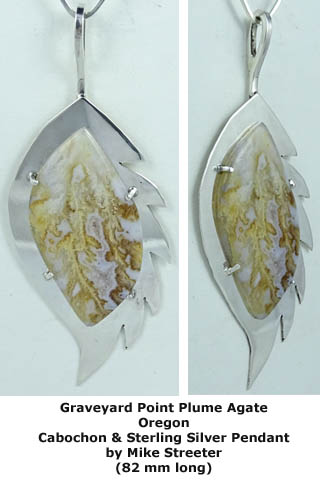
By the way - since I had a preconceived pendant design in order to provide this demonstration, I chose a rock that I thought would work but would not have been my first choice for a feather pendant. So, just to show you what another pendant looks like where I chose the feather design to best suit the shape and pattern of a cabochon that I had already made, check out the following picture.
|